Assigning Priorities to Multiple Slips (v2.8)
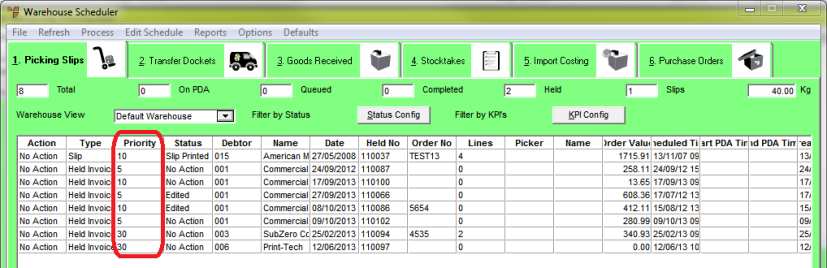
Paperless picking slips are assigned to the paperless queue. Every picking slip in the paperless queue is assigned a priority which determines the order in which the slips are downloaded to PDAs for picking. Those with a higher priority (lower number) appear higher up the list so they are picked first. That is, a slip with priority 1 will be picked before a slip with priority 10.
|
|

|
Technical Tip
There are no predefined picking slip priorities; they can be any value.
The initial priority of a picking slip can be set in a number of different places in your master files and company configuration. This is a complex topic. For more information, see "Setting the Initial Priority of Picking Slips" in the Mobile Applications manual.
|
The order in which picking slips are downloaded to PDAs also depends on whether a picker is assigned. If a specific picker is assigned to a picking slip, the slip can only be downloaded by PDAs that have that user logged in. If no picker is assigned to a picking slip, it is downloaded to the next available PDA according to its priority. If multiple slips are assigned to the same picker, the priority is used to determine which one is downloaded first.
This procedure explains how to assign a priority to multiple slips at the same time.
- Open the Warehouse Scheduler.
Refer to "Displaying the Warehouse Scheduler".
Micronet displays the Warehouse Scheduler - Picking Slips tab.
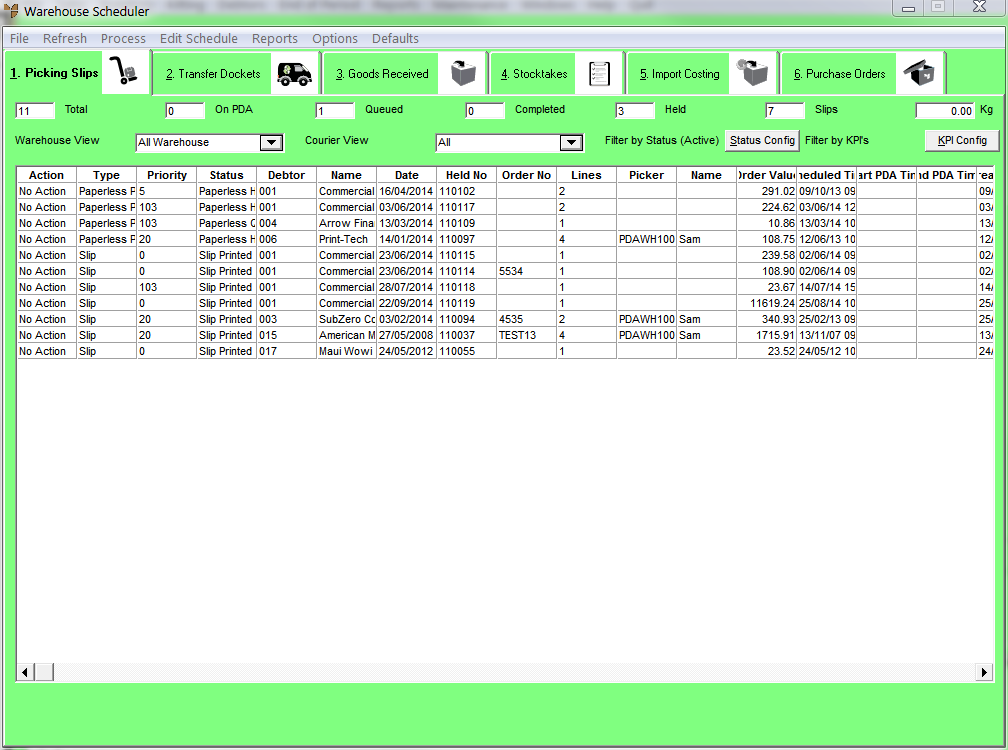
- If required, you can filter the picking slips displayed using the Warehouse View, Courier View, Filter by Status and Filter by KPI's fields at the top of the screen.
Refer to "Selecting the Picking Slips to View (v2.8)".
- Select REFRESH or press F2 to display the selected picking slips.
For more information about the fields on this tab, refer to "Viewing or Changing the Status of a Picking Slip (v2.7)".
- Select the picking slips you want to set the priority for by using the Shift key to select several slips in a row, or using the Ctrl key to select several slips that are not sequential.
Micronet highlights each selected picking slip.
- Select EDIT SCHEDULE | SPECIAL | SET PRIORITY.
Micronet displays the Set all to Priority screen.
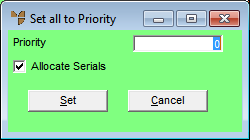
- Enter the Priority you want to assign to the selected slips.
- If the Allocate Serials field is displayed, you can tick or untick it.
When this box is ticked, Micronet will work its way through the serial number / batches in bin priority order until it finds a serial number / batch with enough stock to allocate the entire order quantity.
If no serial number / batch has enough stock to allocate the entire order quantity, Micronet displays a warning message that it failed to find a serial batch for the entire order quantity. You need to either:
- allocate serial numbers to the order line manually – see "Enter Invoice Line - Serial (v2.8)", or
- split the order quantity over separate lines until Micronet can automatically allocate each line from a single serial number / batch.
|
|
|
Technical Tip
This field is only displayed when the Pick from one tile shade field on the Invoicing Configuration screen is set to On Order Scheduling (see "Edit - Program - Invoicing") so that Micronet will attempt to automatically allocate the entire order quantity from one serial number / batch.
Micronet "remembers" whether the Allocate Serials field is ticked or unticked and displays it the same way the next time you open the Set all to Priority screen. This setting is saved in the Registry for each user.
|
- Select the Set button.
Micronet redisplays the Warehouse Scheduler - Picking Slips tab showing the updated priority for all the selected picking slips.